Magento is one of the most popular eCommerce cloud platforms around the world. In this guide, we will show you how to install Magento, make it even easier for beginners to set up their online store flawlessly. Let’s begin.
Table of Contents
How to install Magento? Overview.
With a user-friendly interface with excellent performance, Magento lets you create your online store in just a short amount of time.

However, the start of the installation can be a little overwhelming for beginners with not so strong technical skills.
Today we will help you through all the struggles to make your online shop on the Magento platform.
If you want to understand more about Magento you can head to our Magento Platform article for more detail, also remember to check out our Magento extensions and our Magento themes to support your online store.
Before you install.
It won’t take too many steps to install Magento, to make it through the whole process without any mistake, there are some steps that you have to do before installing.
Make sure your system meets all the system requirements of Magento, you can check them on the Magento website.
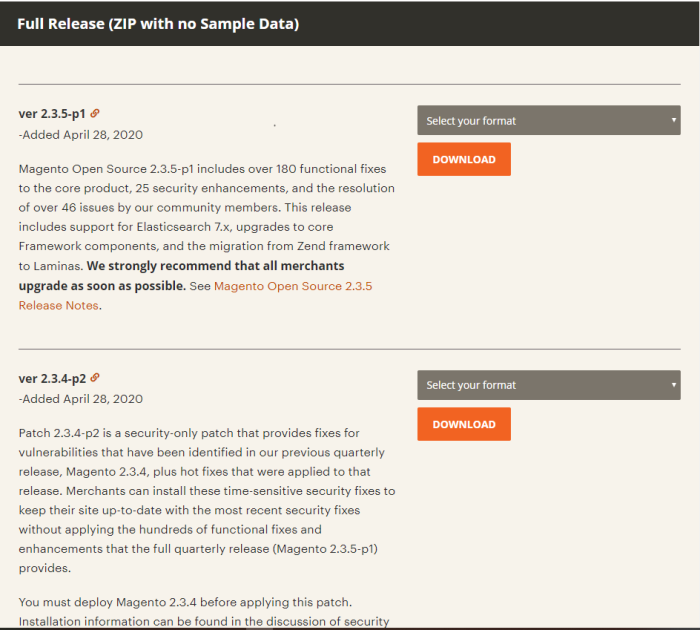
Download Magento
Head to the Download site of Magento
In this step, for the newcomers, you should choose to download the Installation ZIP, because it’s easy for installing, no commands.
Unzip the Magento File
Now when you have the installation file downloaded from the Magento website, it’s time to unzip then put them into the root folder where you want to install Magento.
If you host your own server by XAMPP, put your files into the ‘htdocs’ folder.
Create a Database
The next step is creating a Database for Magento on your hosting Magento.
For example, with XAMPP you can create your database on PHPmyadmin.
Feel free to name the database as you please.
Install Magento
Now, when your database is ready, your Magento files are in the root folder, let’s start, and we will show you how to install Magento.
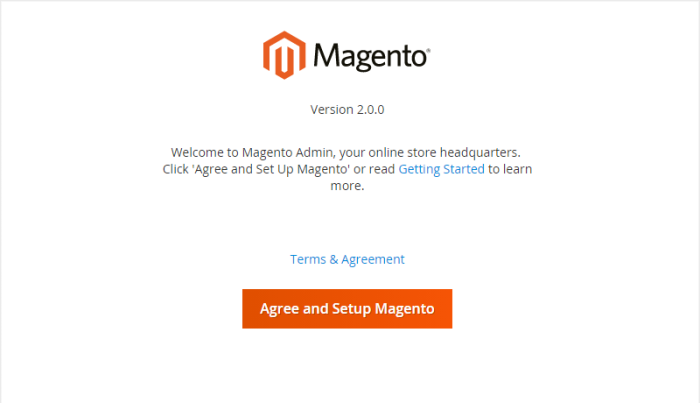
Step 1: Run the Installation
On your browser, you can navigate to the Magento folder. A window that shows the Magento Downloader welcome page will appear, click Agree, and Setup Magento button to proceed.
Step 2: Readiness Check
Click ‘Start Readiness Check’ and your server environment will be validated, your system requirement will be verified, Magento setup will check the PHP Version, PHP Settings, PHP Extensions, and file Permission check.
There might be some error warnings appear, and you can click ‘more detail’ for further information about the issues, you must correct all the errors before checking your readiness again.
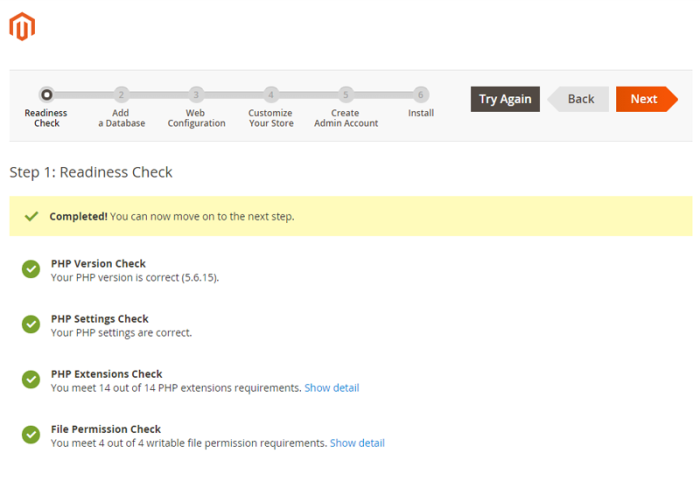
When the check is successful, click next to continue.
Step 3: Add the Database
Remember the database we created before; in this step, you have to add the details of that database.
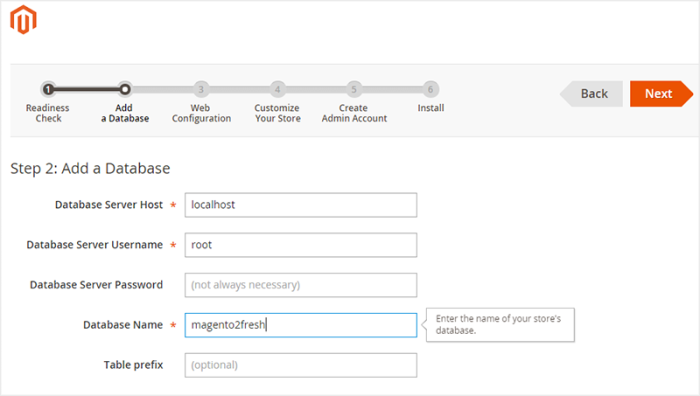
They are Database Server Host, Database Server Username, Database Server Password, Database Name, Table Prefix.
In Database Server Host: Fill in the server hostname or IP address. In the case your server shares the same host with your web server, enter localhost.
Enter the name of the database that you created before in the Database Name box.
The table prefix is optional, so you can just leave it blank.
Step 4: Configure Magento Web
Here you can add your Store Address and Magento Admin Address.
Enter the base URL for your store in Your Store address Box.
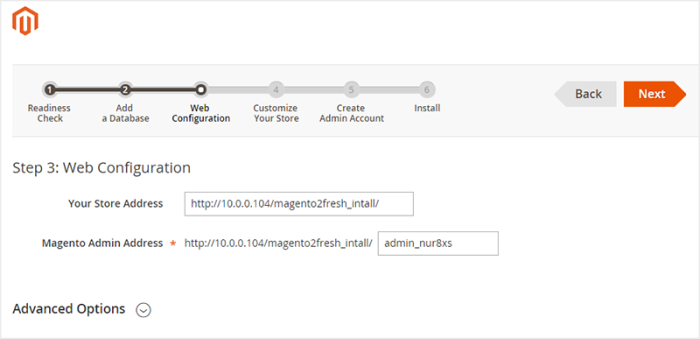
The Magento Admin Access you need to enter the base URL for the shop’s Admin panel, you can leave it there, and the default value will be left as admin.
Step 5: Store Customise
In this step, you can configure the default language, default Time Zone, and default currency for your store.
These values are not permanent, and you can changes them again anytime you want.
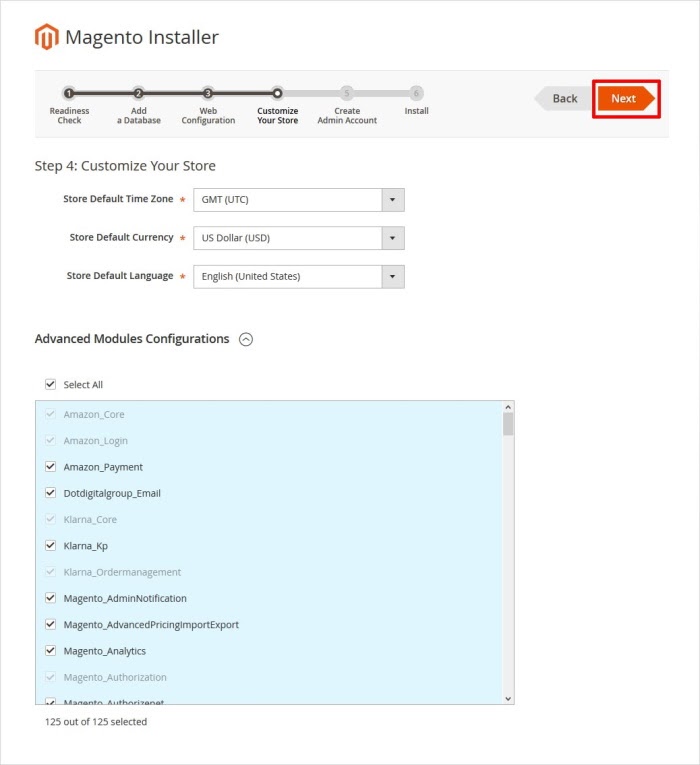
There are also some other advanced options to configure modules, but skip them for now and click the Next button to continue to the next step.
Step 6: Create Admin Account
This is where you create an Admin account that you will use to manage your Magento store after. Remember all these credentials to access your Magento backend.
New Username: Enter the username you want to use for your store Admin account
New Email: Your store owner email
New Password: The password to access the store Admin account
Confirm Password: Type the password again to confirm
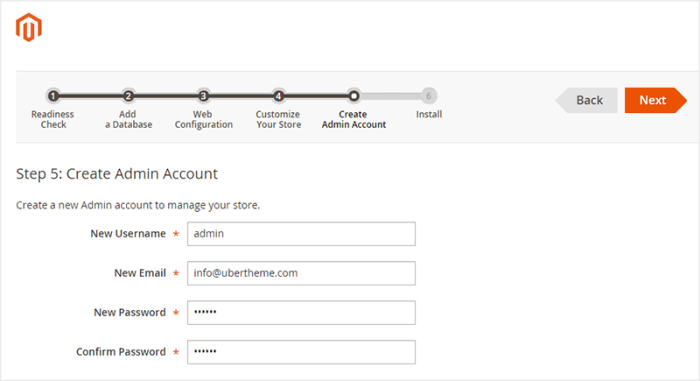
Click the next button when you are done.
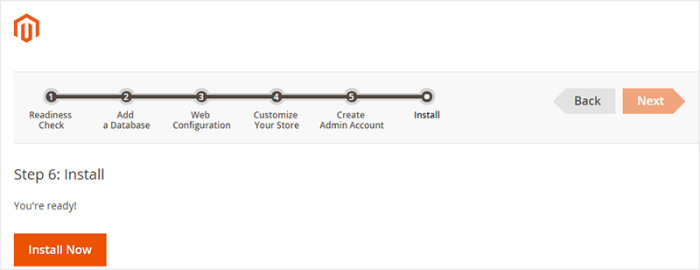
Step 7: Install
Now you are ready to install the Magento to finish click Install Now to begin the installation.
When the installation has completed, a page will appears and show you the details of your installation.
Now you can proceed to the Admin panel by click on Launch Magento Admin button.
Finish
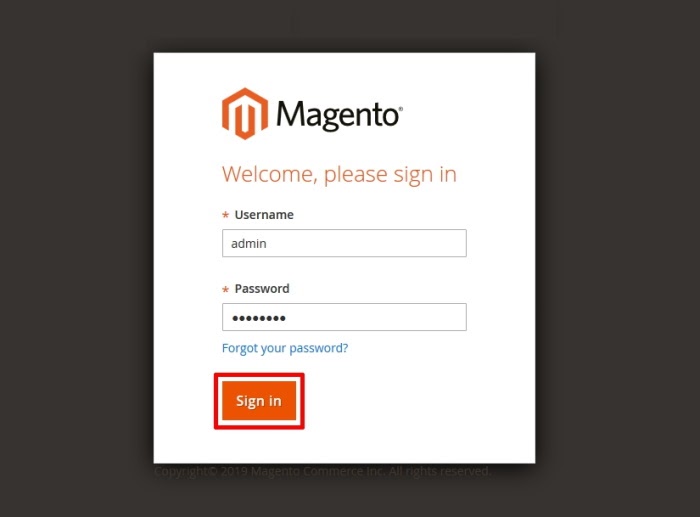
You will be redirected to the sign-in page, input your Admin account username and password that you have created at step 6 above, and hit the sign-in button.
After that, the Magento Dashboard will show up. This is your Magento backend, where you can manage and work with your online store.
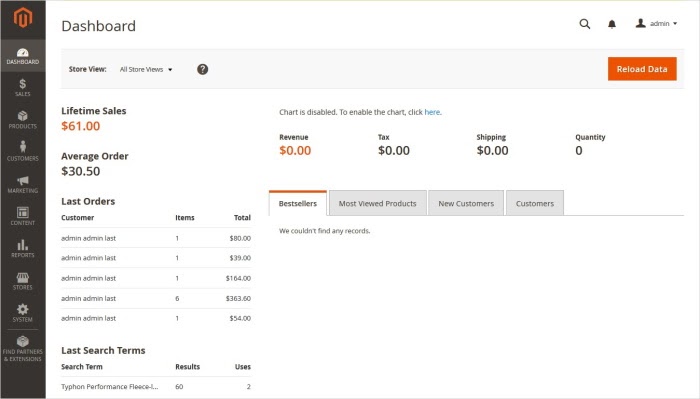
You can now preview your website, explore its exclusive features, and can configure or optimize it as you like.
Some Final Words: Have you known how to install Magento?
That’s it; you’ve just read the complete guide on how to install Magento manually.

There might be many errors that might occur throughout the whole process.
I hope that this guide is useful, and after reading it, you have learned how to install Magento and create your own Magento store.
You can join the Magento community where a large number of developer around the world gather and will support you whenever you need.
This is just the setting up part of your Magento online store, and there’s so much more that you will learn to optimize your website.
If you have any questions or comments, please share it with us. We’re welcome all and always here to support whenever you need it.
Thanks a lot for reading!