Have you wondered how to make your Magento 2 theme customization?
The situation is: you’ve just installed your Magento 2 theme and see the result that is exactly the same as the demo theme. What a nice look!
However, now is the time for the nitty-gritty stuff. You might want to customize your Magento 2 theme like footer text, menu text, slider image, brand logo, web layout…
Although small changes are easy to make, huge changes take time. Some are even impossible to make without a deep understanding of both front-end development and the theme itself.
So what can separate small-large changes? In order to understand this, we have to go through a broader question. Ask yourself: What is the difference between theme configuration and theme customization?
Table of Contents
Difference between configuration and customization

Often, when an enterprise speaks of software customization, it really has a configuration in mind.
As we can see in IQS’s great article on the difference between software customization and configuration, it is easy to mistake configuration and customization when it comes to Magento 2 theme.
Theme configuration is small changes you can make using the vendor’s built-in option which can be easily accessed in Magento 2 admin, with the help of the theme’s user guide.
On the other hand, theme customization stands for making the big change that is not supported by the theme in default and usually relating to altering the theme code.
But what can you do about it? Save days of work by being crystal-clear about your theme changing needs.
Clearly identify Magento 2 theme changing needs

There are 3 steps to take to clearly identify your theme changing needs:
- Name your theme changing needs in detail. For example, “modify theme header” is very vaguely describe, and “move currency and language option from homepage header to homepage footer” is a lot more specific.
- Identify if the modification is configurable in the theme options. You can do this by either examining the theme’s user’s guide carefully or trying to modify the code of the CMS Blocks and Pages. For example, changing the images on the homepage of the default Luma theme can be done by modifying the static block in Magento Admin. At this step, try to avoid making the change to the site’s source code, as it can be hard to keep change in future theme upgrades, and it can result in bugs.
- Determine the importance of the modification. If your modification is not configurable in your theme or Magento admin, ask yourself: Is it essential to your brand, or your website’s interface? If not, try to eliminate the task, as it can be very costly in terms of time and money investment trying to get the exact look you want.
However, we understand that there are times when the theme is critical to your business, you may still want to make the change anyway. There are 3 methods to do that: buy a new theme that has the option of your choice, contact a custom development service, or manually customize the theme yourself. In the scope of this article, we manage to give you some basic steps to manually customize the theme.
Manually customize Magento 2 theme basic tutorial with example
In this section, we will go through steps to basically customize Magento 2 theme by changing files with certain types in your website source code. These types are Javascript, CSS, phtml, and XML.
The manual customization below requires a decent knowledge of theme file structure, and in front-end website development. For the sake of simplicity, we use Luma and Blank as the enabled them in the examples below.
Customize Javascript file
Now we will try to add a class to an element on the homepage. After that, we can style that element the way we want, by defining style rules for the class added.
For example, we want to add a class named “customize-js” to the website header.

We will log in to my FTP account using Filezilla, then go to vendor/magento/theme-frontend-blank/Magento_Theme/web/js
And edit theme.js. Then we will add this command:
$('.page-header').addClass('customize-js');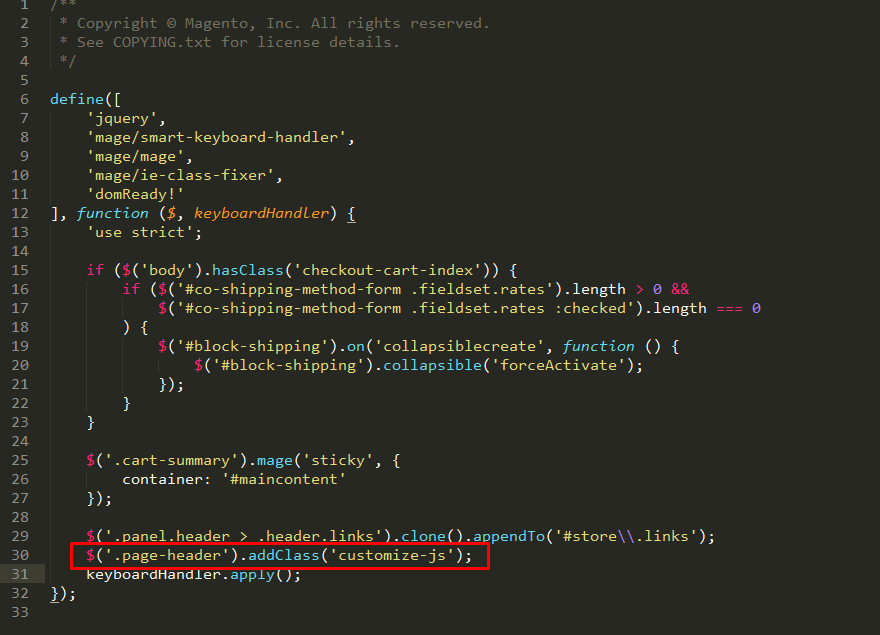
After that, we delete cache and pub/theme by the command:
rm -rf var/cache/ var/view_preprocessed/ var/page_cache/ pub/static/frontend/Magento/blankAnd we will deploy and flush cache using:
php bin/magento setup:static-content:deploy -f
php bin/magento cache:flush
The class is successfully added to the Homepage header.

Customize CSS file
The CSS of a theme is generated through the .less file in standard settings. To customize the CSS, we go to the folder: vendor/magento/theme-frontend-blank/Magento_Theme/web/css/source.
Then we edit the file _module.less.
In this example, we want to change to the color of the panel header into white, and change the color of the text inside to red.

We input these code to the file _module.less:
.page-wrapper {
    .page-header {
        .panel.wrapper {
            background-color: #ffffff;
            color: #000;
        }
    }
    .header.panel {
        >.header.links {
            >li {
                > a {
                    color: #f00;
                    &:visited {
                    color: #f00;
                    }
                }
            }
        }
    }
}
And we will deploy and flush cache using:
php bin/magento setup:static-content:deploy -f php bin/magento cache:flushThe color of the panel header and the text inside it is successfully changed.

Customize XML and pHTML file
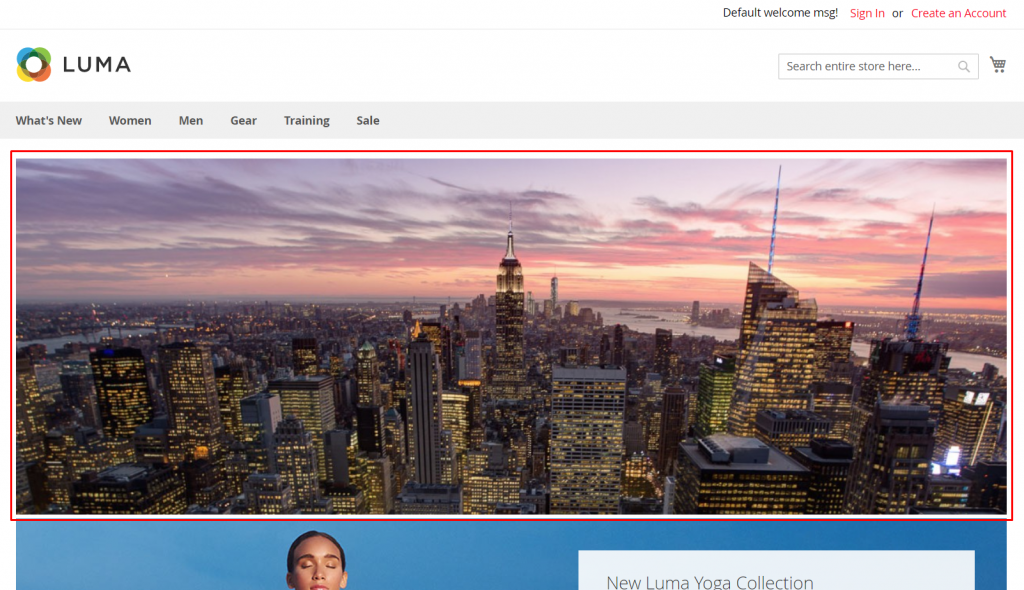
In this case, we want to add an image as a block to the beginning of the homepage.
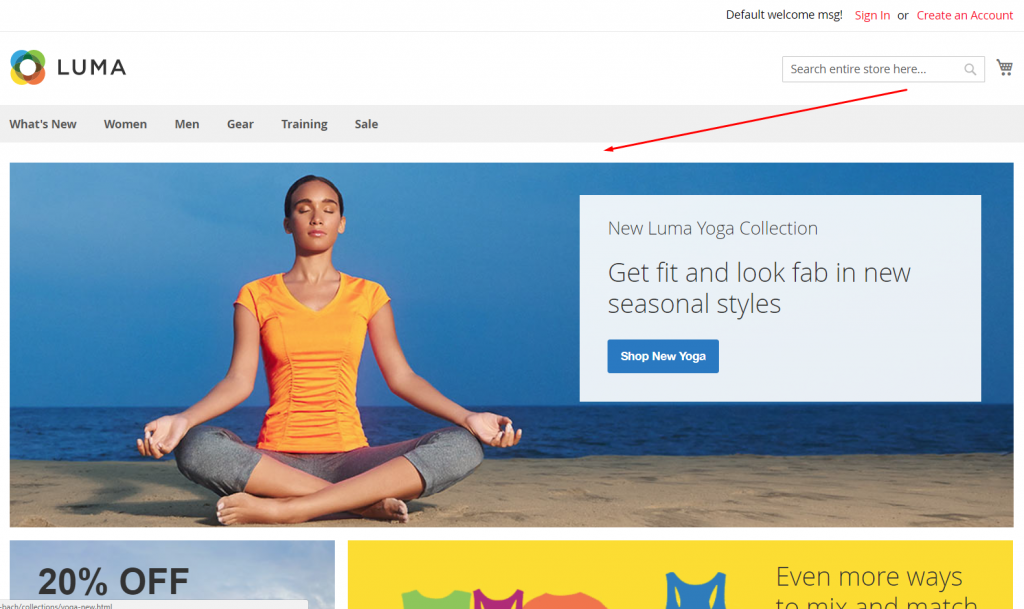
First, we upload the image of our choice to the folder vendor/magento/theme-frontend-luma/web/images. The image in this example is named banner-test.jpg and look like this:

Then we create a directory named: vendor/magento/theme-frontend-luma/Magento_Theme/templates/html
And we create a new file named test.phtml with the link to the image:
<?php?>
<img src='<?php echo $this->getViewFileUrl('images/banner-test.jpg'); ?>' alt="Demo">
After that, we go to the folder vendor/magento/theme-frontend-blank/etc and create a referenceContainer in the file view.xml:
<referenceContainer name="content">
    <container name="name-container" as="name.container" before="-" htmlTag="div" htmlClass="customize-layout">
        <block class="Magento\Framework\View\Element\Template" name="file-phtml" template="Magento_Theme::html/test.phtml"/>
    </container>
</referenceContainer>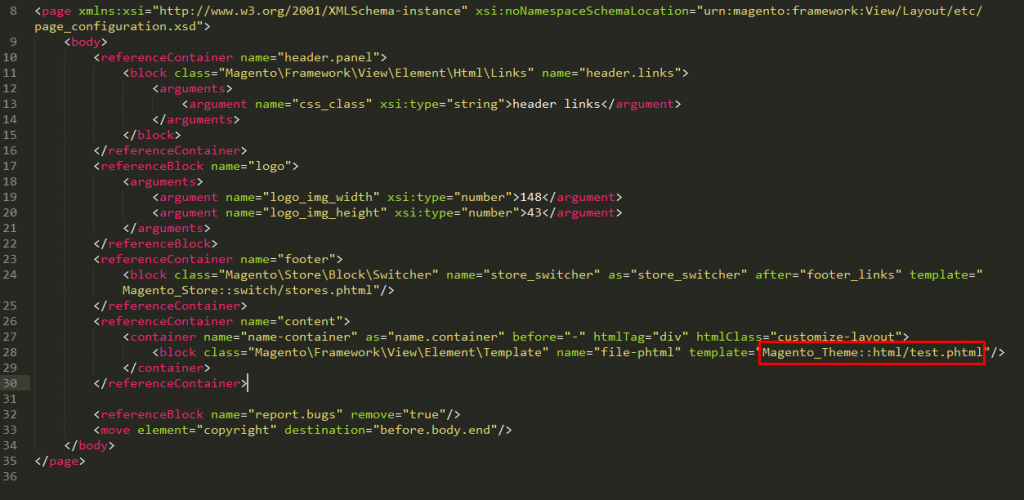
The image is successfully inserted at the beginning of the homepage.
Conclusion
Customizing the theme in your Magento 2 site is an extremely broad matter.
Because the desire to customize theme can be unlimited, it is impossible to have a magical theme that can change exactly the way you want in just some click (that’s why each theme needs a user guide itself).
It is also impossible to write a guide that can help you customize any theme in detail.
In this article, we try to help you understand your needs for Magento 2 theme customization and determine if you should actually customize your theme, given its time and money cost acknowledged.
We also give you some examples of manually customizing certain types of file of your theme manually.
So do you have any more questions regarding Magento 2 theme customization? Let us know right away in the comment section below, and we will respond promptly.
You can also browse the theme we have spent all our time and pride to develop below.


