
Are you curious about how to install Magento 2? A step-by-step guide will be provided in order to help you build the Magento eCommerce website for your business.
No matter what products you are selling, your website’s appearance has to be good-looking enough to capture the customers’ attention and to keep them in the store.
So let’s get your target reached by today’s Magento theme installation tutorial. Let’s get it started!
Table of Contents
Magento 2 Theme Manual Setup
If you’ve successfully downloaded a Magento 2 theme that you like, here comes the step Uploading.
There are several ways to upload a theme, out of which we can divide into two categories: uploading manually or using a command.
In this tutorial, we focus on helping you upload and set up your Magento theme manually due to the simplicity and low requirement of coding experience.
That’s why this way is well-suited for small and inexperienced developer teams.
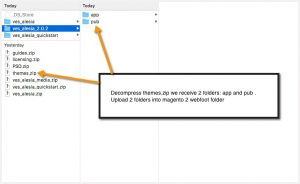
Access the root directory of your Magento 2 store using FileZilla or any SFPT client. Get the app and pub folder uploaded in the root directory that you got after extracting the zipped folder of your theme.
How to Install Magento theme in 6 steps
After a long time waiting, you’ve successfully uploaded and unzipped your theme to your server. Then in order for the theme to be displayed on your site the same as the theme demo, you have to do six more steps to install it.
#1. Upgrade
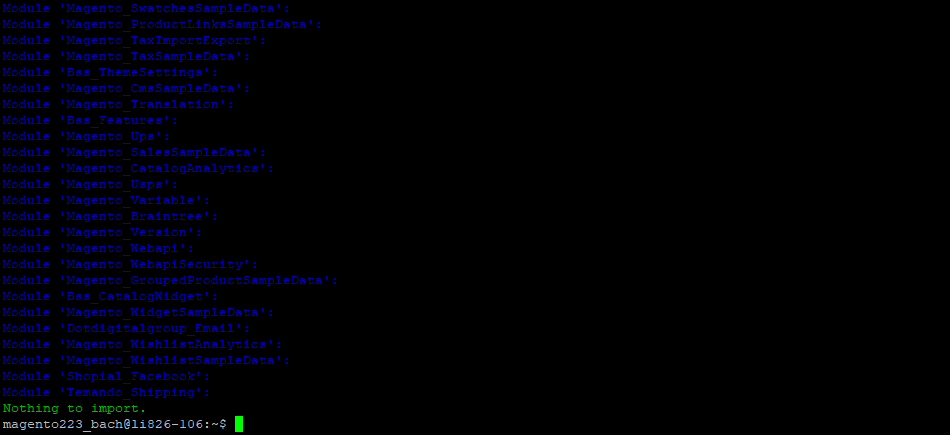
To upgrade, you have to have a terminal emulator installed. In this case, I’m using PuTTY. Begin by logging in your SSH Account using PuTTY. Then input this line of code
php bin/magento setup:upgradeThen you enter. You would have to wait a little bit. Yes, that’s all.
#2. Deploy
To Deploy, go back to the terminal emulator in case you use Magento version 2.1.x and lower, input this line of code:
php bin/magento setup:static-content:deployHowever, in case you use Magento version 2.2.x and above, you have to add “-f”, so the code would be like this:
php bin/magento setup:static-content:deploy –fThen press the button Enter and wait for a while.
#3. Flush the cache
To Flush cache, go to your Magento Admin System > Tools > Cache Management and click Flush Magento Cache.
#4. Enable the theme

To enable the theme, go to Magento Admin > Content > Design > Configuration. Now edit the Main Website Store > Select the theme you’ve just installed.
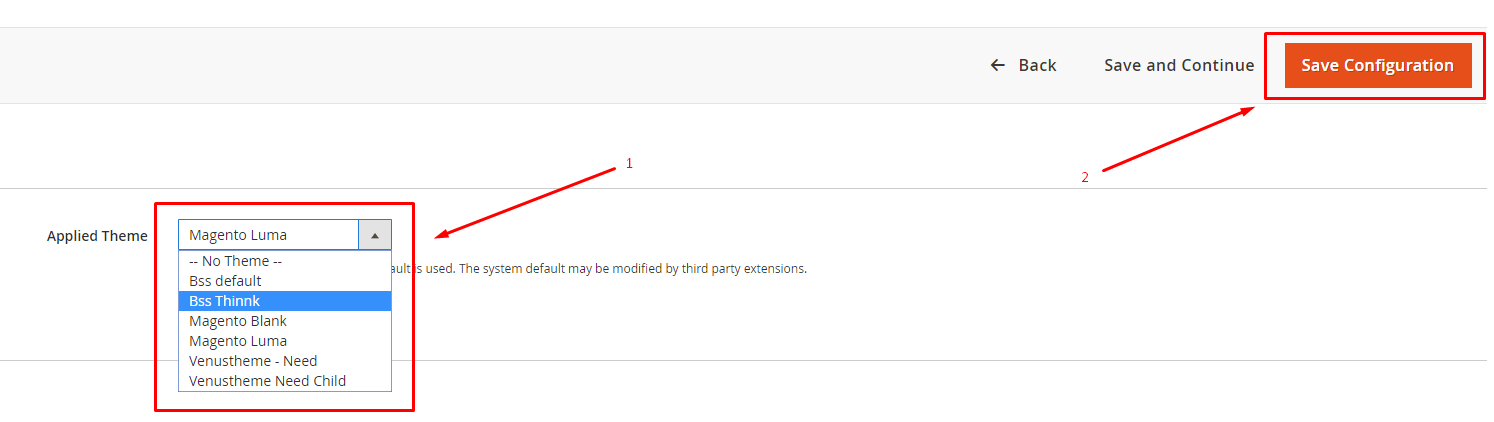
By default, the theme will be the Magento Luma. Now, just select the theme you’ve installed and Save Configuration.
#5. Import data sample
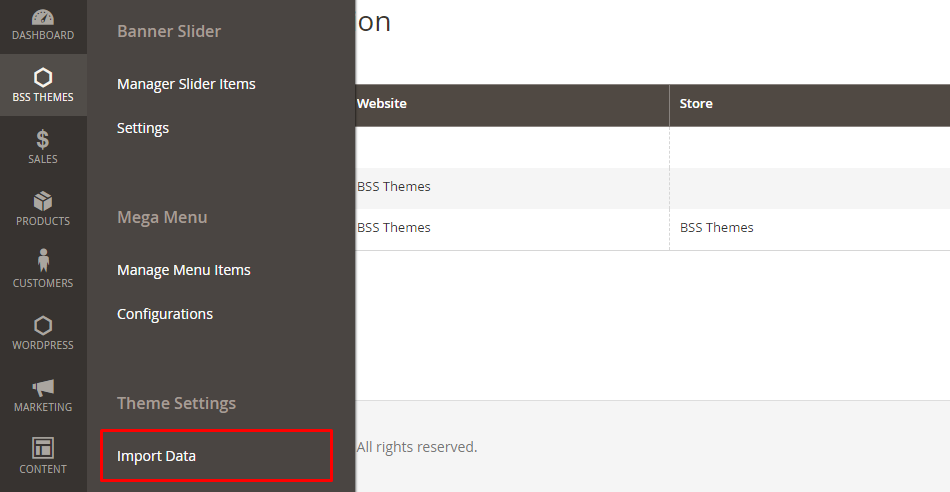
To import demo data, go to your Magento Admin. Then, go to the theme section > Theme Settings > Import Data.
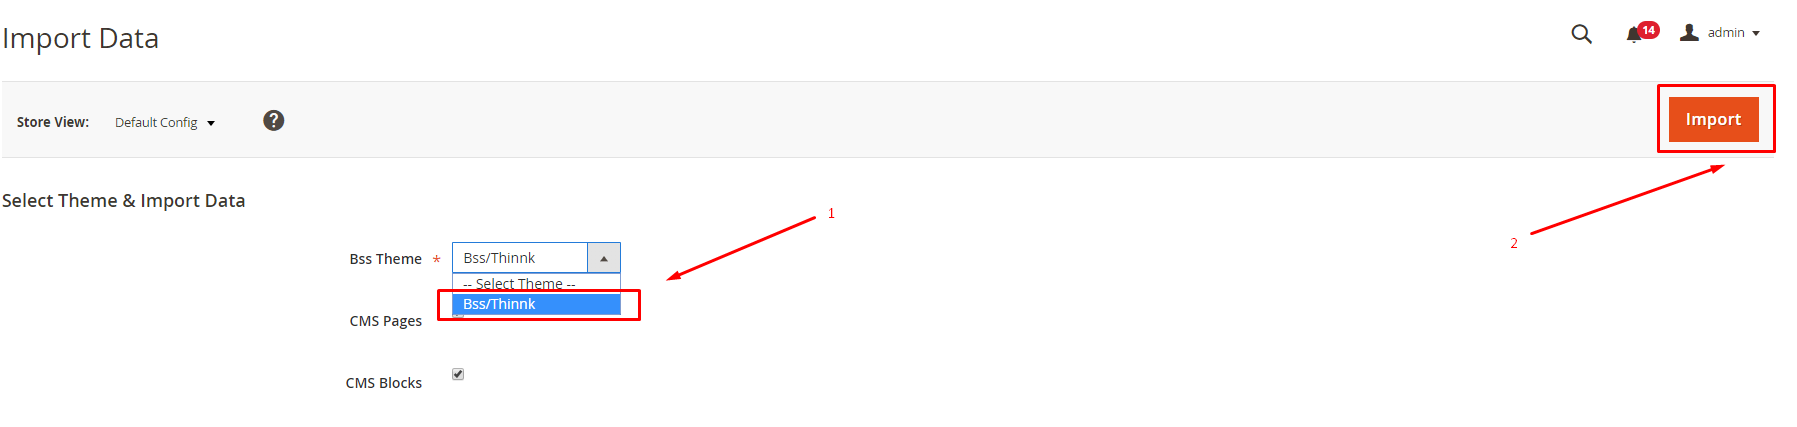
In our Thinnk theme as an example, you can comfortably choose to import both CMS Pages and Blocks. And then, click Import.
#6. Flush the cache again
You do the same as what you did in the third step 3 above. So there, you have a beautiful and full-featured theme installed on your website. The achievement is sweet, as you can see.
FAQs about Magento 2 Theme Installation

#1. How do we do to resolve the problem related to Magento 2.3 installation on localhost?
*Problem: After having installed the Magento 2.3 version with sample data on the localhost on Windows 10 successfully, I tried to go to the Homepage and Admin Control Panel, but they are not properly loaded.
*Solution:
- In Magento Install Directory, open file:
/vendor/magento/framework/View/Element/Template/File/Validator.php > find $realPath = $this->fileDriver->getRealPath($path);
And replace it with:
$realPath = str_replace('\\', '/', $this->fileDriver->getRealPath($path));
- Then, open file :
app/etc/di.xml > find Magento\Framework\App\View\Asset\MaterializationStrategy\Symlink > replace it with Magento\Framework\App\View\Asset\MaterializationStrategy\Copy
- Go to var/cache, delete all folders/ files.
- Refresh the page, and you get the problem addressed.
#2. What do we do in case CSS does not load, and there is only text from the website after Magento 2.2.2 installation?
Magento wants access to a dynamic folder “/pub/static/Version1513859926”, which you did not create before. So you need to create a folder Version1513…and then, Magento will load the CSS file.
It is a dynamic folder. You can edit this option in config Stores > Configuration > Advanced > Developer > Sign Static Files (dev_static_sign) > No. Now your site loads CSS from “/pub/static/adminhtml”.
#3. What do we do in case of the error “too many redirects”?
* Problem: After setting up and installing the Magento, I went to the admin page, but the error “too many redirects” occurs, leaving the page not working.
* Solution: It maybe because of the existing browser cache/cookies that cause the issue. What you need to do is to clear browser cache & cookies, and it should work for you. Let’s see if that works for you!
#4. What do we do if an error turns up when we are running setup:di:compile?
*Problem: When we were running setup:di:compile, an error message turned up:
PHP Fatal error: Declaration of Temando\Shipping\Model\ResourceModel\Carrier\Collection::fetchData() must be compatible with Temando\Shipping\Model\ResourceModel\Webservice\Collection::fetchData(Magento\Framework\Api\SearchCriteriaInterface $criteria) in /var/www/vhosts/XXX/htdocs/vendor/temando/module-shipping-m2/Model/ResourceModel/Carrier/Collection.php on line 22*Solution: There are two ways to tackle the problems. Try one by one and see which one is better for your case.
- Solution 1: The error can generally be resolved by disabling the module!
- Solution 2: Run the command:
rm -rf vendor/*
#5. What do we do if an error occurs during Magento 2 Themes Installation (66% finished)?
It is because of the execution timeout issue. You need to do the below configuration in the php.ini file. In your php.ini file, the configuration should be like below:
- max_execution_time = 18000
- max_input_time = 18000
- memory_limit = 1024M
Then, your issue will be adequately addressed.
Conclusion

There are many things involved in the success of every e-commerce store, but a great theme is one of the most prominent ones.
If you know how to install the Magento theme well, your online project is more likely to take off.
I believe that after following this simple guide, you should be able to setup Magento 2 themes on your own.
Thank you for your time, and I wish you a successful installation.


Awesome article, wish I had found it sooner.